Friday, January 27, 2017

PC with PCI SSD reboots continuously during Windows 7 image

My ISSUE: I received a couple new OptiPlex 7040 PC's with new PCI SSD cards installed.  We're still using Windows 7 here, so when I received them I plugged them straight into my network to image.  My image started to load fine, got past the driver injection but somewhere during the OS install it rebooted.  It came back up and asked if I would like to boot normally, I told it yes so it tried to load into Windows which obviously wasn't loaded yet.  I did some searching and found that Windows does not have native driver support in Windows 7 or Server 2008 R2 for NVMe PCIe drives.


THE FIX: Apparently you need 2 hotfixes in order to fix this issue:
Update to add native driver support in NVM Express in Windows 7 and Windows Server 2008 R2
https://support.microsoft.com/en-us/help/2990941/update-to-add-native-driver-support-in-nvm-express-in-windows-7-and-windows-server-2008-r2
"0x0000007E" Stop error after you install hotfix 2990941 in Windows 7 SP1 or Windows Server 2008 R2 SP1
https://support.microsoft.com/en-us/help/3087873/-0x0000007e-stop-error-after-you-install-hotfix-2990941-in-windows-7-sp1-or-windows-server-2008-r2-sp1

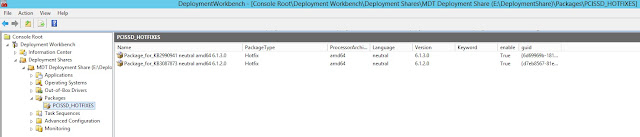
Once you've downloaded those 2 hotfixes, you may upload them into MDT as packages to install in your image to fix the issue.

1. Inside MDT2013, right-click Packages, New Folder, and name it something appropriate. Then right-click on your folder and click on Import OS Packages.  Browse to your files and upload them. 
 
 
2. click the down arrow at Advanced Configuration, then right-click Selection Profiles.  Click New Selection Profile.
 
3. Give the selection profile an appropriate name (I usually name it the same as the package so I can keep track of them).
 
4. Click Next and click the plus sign by packages, and click in the box next to your new package.
 
5. Click Next and Finish when done.
 
6. Just to keep things separate, I created a new Task Sequence for my image, just for these PCIe SSD drives. 
Right-click on Task Sequence, click on New Task Sequence. Set it up just like the original task sequence, but put something in the name that signifies that it is for a PCIe SSD drive image.


7. When the wizard is finished, double click on your new task sequence, navigate to Preinstall, then click on Apply Patches.  Click Add at the top, then General and Install Updates Offline.

8. This should put your new entry above the Apply Patches step.  Make sure you signify in the name what it is for, then click the down arrow under selection profile and choose the profile your just created.
 
Then try your image again, and it should work!    

Monday, October 3, 2016

iPhone not displaying in Windows Explorer in Windows 7


If you're anything like me and you're constantly filling up your iPhone with photos, you regularly need to copy them off and clean it up!  But if you ever plug your iPhone into your Windows PC and it does not show up in Windows Explorer, you may need to uninstall your iPhone driver and re-install.  Here's how you do that:


1. Plug in your iPhone, and open up windows explorer.  If you don't see your iPhone show up in the left hand pane under Computer, down to the bottom of the list, you probably need to un-install the iPhone driver. 


2. Click Start, right-click Computer, then left-click Manage


3. Click on Device Manager in the left pane, then click the arrow next to Universal Serial Bus controllers. Right-click the Apple Mobile Device USB Driver.  Click on Uninstall in the menu.


4. click the check box next to "Delete the driver software for this device." Then click okay.


5.  A box will come up that says "Confirm Device Uninstall" that says "Uninstalling devices...". This process will take some time, and you will most likely need to unplug your phone after some time.  Once you do, this box will close. 


6. Plug your phone back in, and you should see in the bottom right hand corner a bubble that the "Device driver software installed successfully". 


7. You may need to unplug and re-plug in your iPhone, then open up Windows Explorer and you should see your iPhone list in the left hand pane listed under Computer. 


Also, please check your phone to make sure you have allowed your PC to access the files on your iPhone.  If you see this message, press Allow. 

Monday, September 26, 2016

Using hMailServer to relay Stratagy ES UM Messages using Authentication

If you've ever had a request to have voicemails forwarded to email from a Toshiba phone system using Strategy ES, there is some tweaking you'll need to do but it is possible with a third party mail service called hMailServer.     

hMailServer can be downloaded at http://www.hmailserver.com/index.php?page=download


a.) Login to your voicemail server
b.) Start Toshiba Network eManager (icon on desktop)and login
c.) Click on Connect to Equipment -> check the equipment to connect to, then click Connect
 
1. Configure Stratagy to relay all mail to a specific IP address and port
Click on Stratagy ES at the top -> Then Click VM System -> VM Parameters
 
 
Define an IP address and SMTP port (other than 25) to which Stratagy will relay UM messages. Separate the values with a comma, without spaces.

sys_smtpserver_gateway –
sys_smtpserver_host –
 

2. Install hMailServer on the MAS
Install hmailServer using default values. After installation, open the hMailServer Administrator, and enter the password you defined in the installation wizard.

3. Configure incoming SMTP settings
First, we need to change the port on which hMailServer will listen for incoming SMTP mail.


 Select TCP/IP Routes, click on the SMTP port and then click Edit.


Change the TCP/IP port to the one that you defined in Stratagy's sys_smtpserver_gateway parameter, and then click Save. Click OK to confirm restarting the hMailServer service.
 
4. Define the IP range to relay
We must specify the IP address ranges that are allowed to relay through this mail server.
Select Incoming Relays, and then click Add.
Enter the IP address range that is allowed to relay through the server. For maximum security, enter only the IP address of the MAS

5. Add an IP range that is allowed to send mail into hMailServer without authentication
Since Stratagy ES sends UMK emails unauthenticated, we need to define special properties for mail coming in from the IP address of th eMAS so that hMailServer will accept these incoming messsages without authentication. Click on IP Ranges, and then click the Add button.


Give the range an identifying name (e.g., MAS), enter the MAS IP address into the lower and Upper IP range fields, and configure the settings as shown above. Make sure to set the priority value to a high number so that this rule will be evaluated first, and disable all authentication requirements.

6. Configure outbound authentication
There are two methods that we can set up the outbound authentication:

1. Relay all mail through a particular server with authentication, or
2. Relay mail addressed to specific domains using authentication, and all other domains are send without authentication.


Relaying all mail through a particular server with authentication.
This method is used to send all mail, addressed to any email domain, through the same email server with authentication.
To configure this, expand Protocols, and then click on SMTP.


Select the Delivery of e-mail tab. Enter the Local host name of the system. This is the name by which this server will identify itself, and will generally be the same domain name that was entered into the sys_smtpserver_host parameter.


Enter the server to which all email will be relayed under Remote host name, and the TCP port to which it will connect.

Enable Server requires authentication, and enter then username and password to be used as the credentials.


If SSL is required, enable Use SSL.